Article No. 85
Created: 09:04 PM 04.04.12
Author: Support
Original URL: http://myonlinehostingsupport.com/question.php?qstId=85
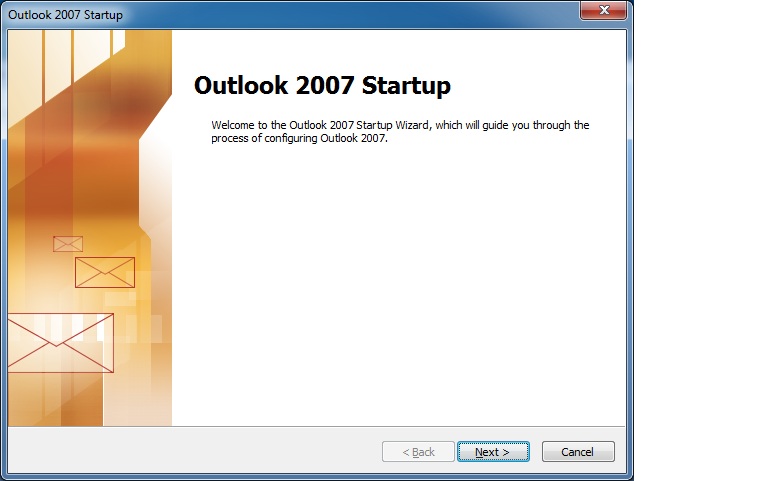
When starting Outlook for the first time (where no email service has been configured yet), you will be presented with a setup wizard.

Click Next
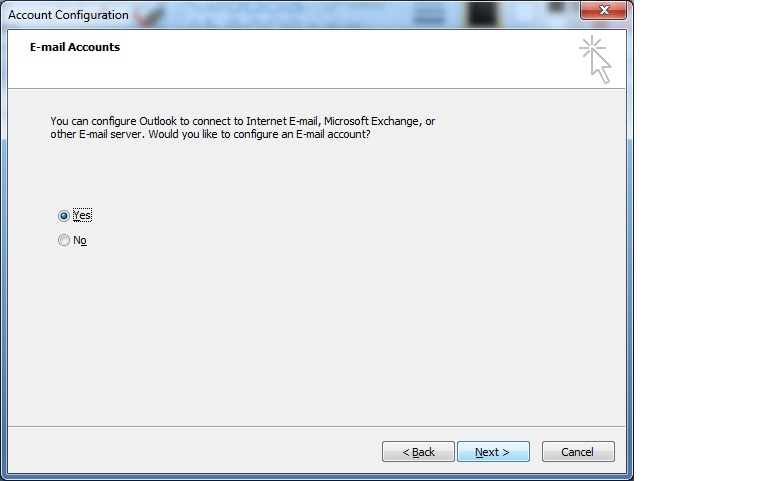
Choose Yes to configure an Email Account and click Next
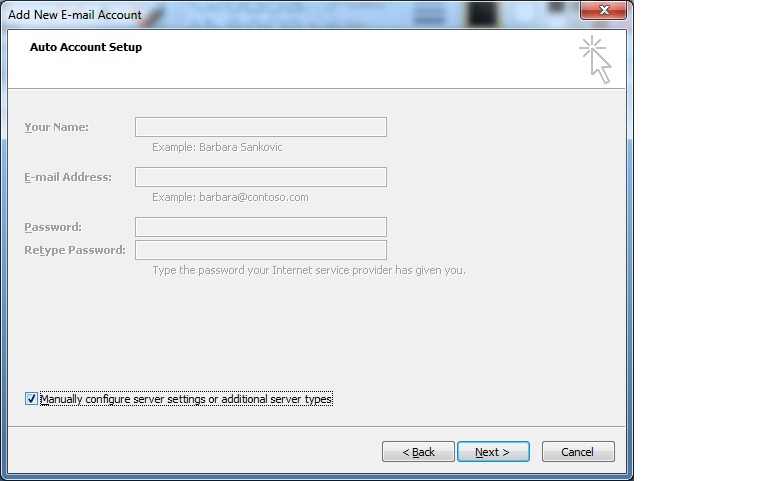
At this screen, place a checkmark on "Manually Configure Server Settings" and click Next
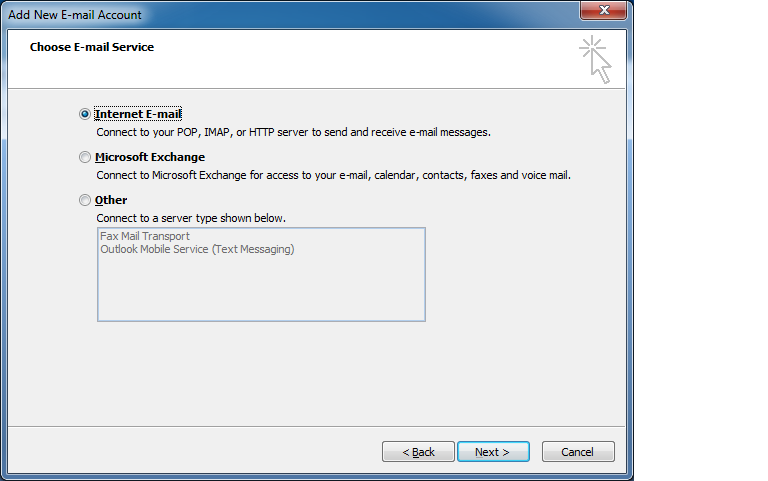
Select Internet E-Mail and click on Next
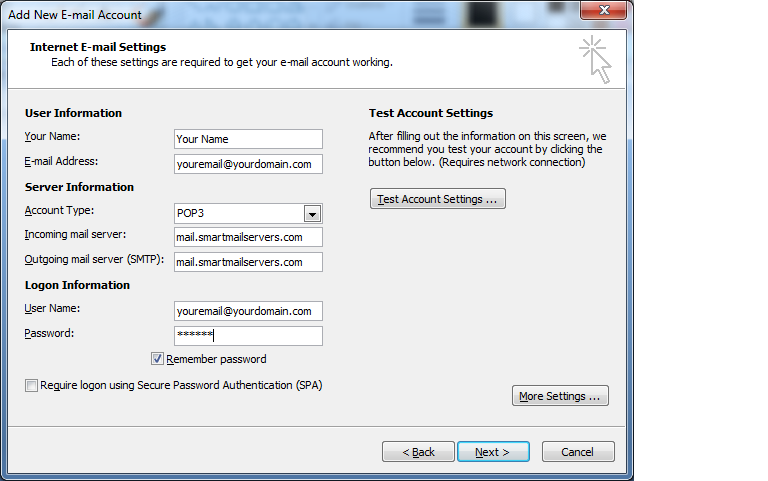
On this Screen, fill in the settings as shown. Of course yourdomain should be replaced with your domain name.
Account Type: POP (Recommended)
We recommend Selecting POP as the Account Type. This means that your email software will download your email to your computer (but will allow you to leave some on the server if you use a portable device such as a SMARTPHONE.
Account Type: IMAP (Recommended for Advanced Users)
You can also Select IMAP for the account Type. This means that Outlook will connect to your mailbox on our system live. All your email will be stored on the server. This is handy, however you must then from time to time, download or archive your email to personal folders in your email program to prevent your mailbox from filling up. We recommend using POP instead and later we show you how you can leave some mail on the server so you can use multiple devices to access your email.
Your Name: Your name as you want it to be shown on your emails
Your Email Address: your email address on our SmartMailServer system
Incoming Mail Server: mail.smartmailservers.com (or you can use mail.yourdomain.com - substituting your domain name)
Outgoing Mail Server: mail.smartmailservers.com (or you can use mail.yourdomain.com - substituting your domain name)
Username: Your Email Address
Password: your password
You have the option to save your password by checkmarking the save password box. If you ever change your email password - you would need to update your saved password in these settings.
Do not checkmark the box that says "Require logon using secure password authentication"
Click on MORE SETTINGS and then on the Outgoing Server tab. These settings are the default and can be left as shown.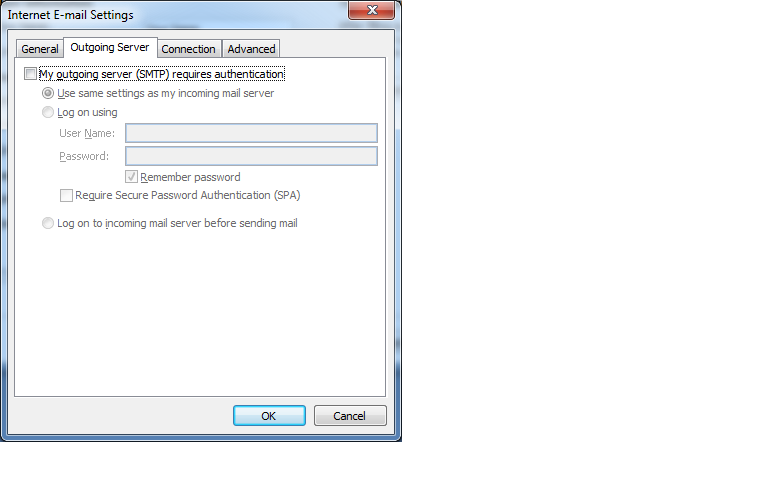
Click on the Advanced Tab.
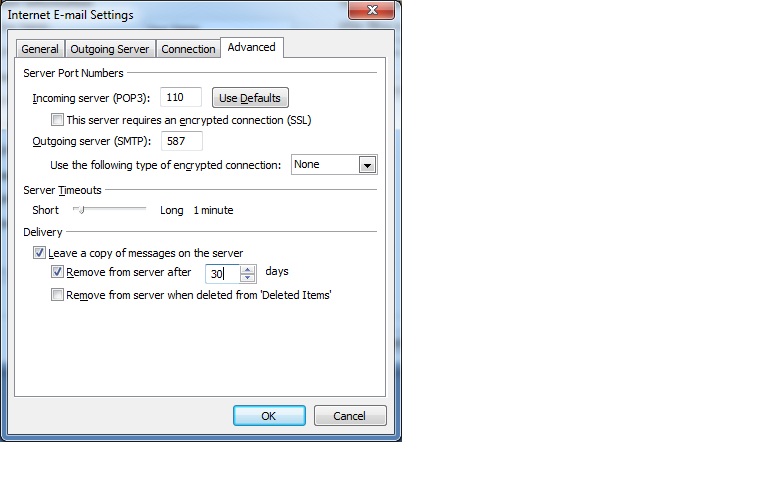
Shown on this screenshot are the recommended settings.
Incoming Mail Server Port: 110 (If POP was selected previously)
Outgoing Mail Server Port: 587 (default is 25)
The outgoing mail server port should be changed from 25 to be 587. This is due to the fact that many ISPs prevent port 25 from connecting to any mail system besides theirs. So this bypasses that and allows you to send mail through our system for your email address.
Leave Mail On Server: Optional
If you mainly only use 1 computer / device to check your email -- ie if you only really use this outlook to check email - you should leave this off. However if you use a smartphone, or perhaps use our Webmail interface from remote locations, you may want to turn this on. This means that email will be downloaded to your Outlook, but a copy will be left on our server so that other devices can also download it.
CAUTION: The following setting "Remove from server after XX days" We recommend this also be turned on when you leave mail on server. This ensures that mail is not left on the server indefinately. This keeps your mailbox from filling up on the server. Generally we recommend customers specify 14 days (2 weeks) or 30 days.
Having mail removed from the server after XX days means that this Outlook will download you email, leave a copy behind but nothing older than the number of days specified. So basically other devices such as your SMARTPHONE or other computers where you also check mail from will have an opportunity to download the same email as well. Also in the case of Smartphones, to minimize your data plan use - only your most recent emails will be available and shown.
If you don't turn on the option to "remove from server after XX days" then your mailbox on the server will eventually fill up and that will cause your mailbox to not be able to receive anymore emails when full. You would need to download manually your excess emails. So its recommended this setting be on to keep your mailbox clean
Click OK to close these advanced settings. You will be returned to the main setting screen.

Click Next
Click Finish and you are done.